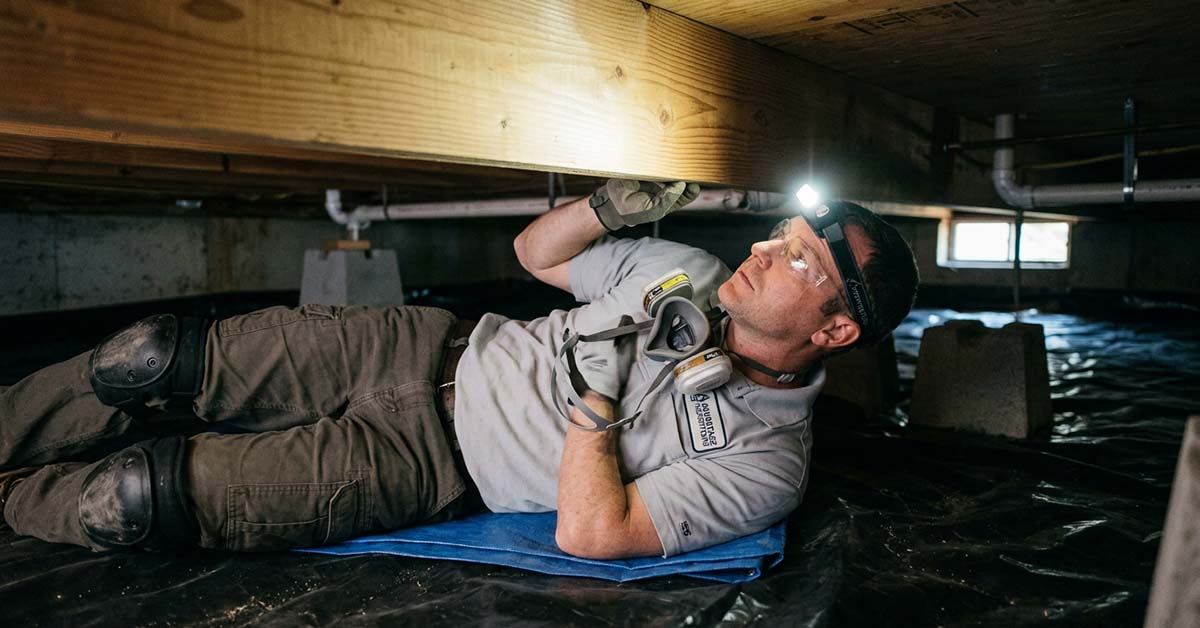
The crawlspace is the part of a raised-foundation home that almost no homeowner ever sees, and it is where some of the most consequential information about the building lives. Moisture problems originate here. Sub-floor framing rots here. Plumbing and electrical systems run through here. The choices a previous owner made about ventilation, vapor barriers, and drainage thirty or fifty years ago show up in the condition of the wood overhead today. As an InterNACHI-certified home inspector working in Ventura County, a thorough crawlspace inspection is one of the highest-yield parts of any inspection on a raised-foundation home—and it is also where I spend the most time on hands and knees with a flashlight.
Here is what a careful crawlspace inspection covers, what tends to be wrong in California homes specifically, and how to interpret what gets reported.
Crawlspace vs. Slab: What Foundation Type You’re Working With
Not every California home has a crawlspace. In Ventura County, the housing stock is roughly split between slab-on-grade construction—a single poured concrete slab that the home sits directly on—and raised foundations with a sub-area crawlspace below the floor. Slab homes are most common in post-1970s subdivisions; raised-foundation homes dominate older neighborhoods, hillside lots where slab construction is impractical, and many of the Spanish-style and craftsman bungalows in Ventura, Ojai, and the older parts of Oxnard and Camarillo.
Within the raised-foundation category, two construction types are common:
- Continuous perimeter foundation. A poured concrete or, in older homes, masonry stem wall runs around the entire perimeter of the building, typically with concrete piers at intermediate points to support girders running under the floor. This is by far the more common type in homes built from the 1940s onward.
- Post-and-pier foundation. Discrete concrete piers (sometimes precast, sometimes formed in place) support wood posts that in turn support the floor framing, with no continuous perimeter wall. Common in older bungalows, hillside homes, beach cottages, and some mid-century homes built quickly on level lots. Post-and-pier foundations have particular vulnerabilities to seismic and lateral movement, and many California homes with this foundation type have been—or should be—seismically retrofitted with foundation bolting and bracing.
The first thing I confirm when entering a crawlspace is which type I am in, because the rest of the inspection reads against that baseline. A post-and-pier foundation in a hundred-year-old Ventura bungalow has different expectations than a continuous-perimeter foundation in a 1960s ranch.
Access and Conditions
InterNACHI’s Standards of Practice require an inspector to enter and traverse the crawlspace where conditions allow safe entry. “Conditions allow” carries weight here too. A crawlspace I will not enter is one with:
- Standing water of any meaningful depth
- Active sewage leakage or strong sewer odor
- Extremely low clearance that does not permit movement on hands and knees
- Visible structural collapse, sagging, or unsafe framing
- Evidence of large or aggressive animal activity—wasp colonies, snakes, raccoons, feral cats
- Suspected hazardous materials like exposed asbestos pipe wrap that is actively friable
When the crawlspace cannot be safely entered, the report should clearly state the limitation, the reason, and the extent of any partial inspection performed from the access opening. Common access points in California homes are an exterior knee-wall hatch, an interior closet floor hatch, or a removable section under a porch deck.
Sub-Area Ventilation
A traditional vented crawlspace relies on outside air moving through perimeter foundation vents to keep the space dry. The California Residential Code, in CRC R408.1, requires one square foot of net free vent area for every 150 square feet of under-floor area. That ratio can be reduced dramatically—to one square foot for every 1,500 square feet of under-floor area—when a Class I vapor retarder is installed across the ground surface. Vents should be distributed around the perimeter to actually move air through the space, not just clustered on one wall.
Common ventilation issues I find:
- Blocked or covered vents where landscaping, paint, or stored items have obstructed the vent screen
- Too few vents, or vents only on two opposite sides of the foundation, leaving dead-air zones
- Damaged vent screens that allow rodent or insect entry
- Dryer vents terminated under the house instead of to the exterior, dumping warm humid air into the crawlspace—a major source of moisture problems
- HVAC ductwork running through unconditioned crawlspaces without proper insulation, sweating in summer and shedding condensation onto framing below
There is also a newer approach—sealed and conditioned crawlspaces—where vents are deliberately closed off, the ground is encapsulated with a heavy reinforced vapor barrier, the perimeter walls are insulated, and conditioned air from the home is introduced. Done correctly, this approach can outperform a vented crawlspace in coastal humid climates. Done incorrectly—closed-up vents with no encapsulation and no conditioning—it creates exactly the moisture trap traditional ventilation was designed to prevent. If a Ventura County home has had its vents closed off, I want to see clear evidence the rest of the system was installed too.
Vapor Barriers and Moisture Control
The single most effective defense against crawlspace moisture in our climate is a properly installed ground vapor barrier—a sheet of polyethylene (typically 6-mil or thicker) covering the exposed soil, with seams overlapped and edges run up the perimeter walls. The vapor barrier interrupts the constant upward migration of soil moisture and dramatically reduces the humidity load the ventilation system has to handle.
What I look for and document:
- Presence and coverage of a ground vapor barrier—is it everywhere, or are there bare patches of dirt?
- Condition—torn, displaced, or compressed sheeting that is no longer doing its job
- Seam overlap and perimeter detail—proper installation overlaps seams 6–12 inches and runs up the stem wall
- Standing water on top of the vapor barrier—a classic sign that water is entering from somewhere outside and being trapped on the plastic, often more visible than soil-stained sheeting suggests
- Efflorescence on the inside of the perimeter stem wall—the white powdery deposits that indicate moisture is migrating through the masonry. Our efflorescence guide covers what these deposits mean in detail.
Other moisture-related findings I document:
- Water staining on perimeter walls or piers, often showing a high-water line from a past flooding event
- Mineral deposits or salt staining on concrete, indicating chronic moisture
- Wet or compacted soil in low spots of the crawlspace
- Plumbing leaks—drips from copper pipe joints, condensation on cold-water lines, leaking drain pipe connections, water heater pan overflow lines that terminate under the house instead of to daylight
- Visible mold or microbial growth on framing, sheathing, or insulation. As an inspector, I document the visual presence and recommend further evaluation by a qualified mold assessor; I do not perform sampling, lab analysis, or remediation.
Sub-Floor Framing Condition
The framing visible from a crawlspace is the structural skeleton of the floor system: girders, posts, joists, sub-floor sheathing, and the connections between them. A careful inspection reads each of these for current and past problems.
Wood-Destroying Organism Damage
California’s combination of mild temperatures, occasional moisture, and well-aged wood framing is friendly territory for wood-destroying organisms. The two main categories are:
- Subterranean termites, which build mud tubes from the soil up onto wood framing, and which leave hollow-sounding, blistered wood with internal damage following the grain
- Drywood termites, which colonize wood directly and leave small piles of granular fecal pellets (frass) and pinhole exit galleries
I document evidence I can see—mud tubes, frass, hollowed wood, blistered surfaces, and visible damage—and recommend a specialty pest inspection (the California Section 1 wood-destroying-organism inspection) for any property with significant findings or any older home where one has not been done. The Section 1 inspection is a regulated, separate service performed by a licensed structural pest control inspector and is required for many real estate transactions in California involving FHA, VA, or some conventional financing.
Wood-destroying fungi—dry rot, white rot, brown rot—also show up in crawlspaces, especially in homes with chronic moisture problems. The damage looks different from termite damage (cubic checking and shrinking with brown rot, soft fibrous decay with white rot) but the structural implication is similar: the affected wood needs to be replaced, and the moisture source has to be corrected first.
Framing Defects and Modifications
Beyond pest damage, I look for:
- Sagging girders or joists—often a sign of undersized framing, post settlement, or moisture-related softening
- Cut, notched, or drilled framing members beyond what the code allows—common where plumbers or electricians have worked under the house without consideration for structural impact
- Posts not properly bearing on piers—shimmed with random wood scraps, set off-center, or lifted off the pier entirely
- Missing or rotted post bases at the soil-to-post transition (one of the most common failures in older post-and-pier construction)
- Fasteners missing at structural connections, or evidence that brackets and hardware were never installed where they should have been
- Foundation cracks, especially diagonal or stepped cracks at corners, that can indicate movement. Our guide to foundation cracks covers how inspectors evaluate severity.
Seismic Retrofit Status
For older raised-foundation homes in California, the foundation-to-framing connection is also a seismic concern. A properly retrofitted crawlspace shows:
- Foundation bolts at regular intervals through the mudsill into the concrete
- Steel plate washers at each bolt
- Cripple wall bracing with structural plywood sheathing on the short walls between the foundation and the floor framing
- Seismic hold-down hardware at corners or shear-wall ends in some retrofits
I document what is observable. A full seismic evaluation belongs to a structural engineer, and California’s Earthquake Brace + Bolt program offers homeowner grants in eligible ZIP codes for qualifying retrofit work.
Plumbing, Electrical, and HVAC in the Crawlspace
The crawlspace is also where I see most of the home’s mechanical systems’ undercarriage. I report:
- Plumbing pipe materials and condition—copper, galvanized, ABS, PVC, or in older homes, original cast iron drain lines. (For more on what to expect from old pipe, see our galvanized plumbing guide.)
- Active leaks or signs of past leaks at supply lines, drain lines, and traps
- Electrical wiring run under the home—proper support, no abandoned splices in the open, no Romex laid directly on the soil
- HVAC ducts—condition of the duct material, presence and condition of insulation, evidence of disconnections or rodent damage, and crushed flexible duct that restricts airflow
- Sump pumps or French drain systems if the home has had drainage work done
- Water heater seismic strapping if the water heater is located in the crawlspace (rare, but it happens)
For Buyers
You will not get into the crawlspace yourself before making an offer, but a few questions during the walk-through help. Ask the seller or their agent: Is this a continuous foundation or post-and-pier? Has the home been seismically retrofitted? Has there ever been water in the crawlspace? Is there a vapor barrier? Then leave the actual reading to your inspector, and pay close attention to the crawlspace section of the report—standing water, active leaks, structural framing damage, and visible mold are the categories that most often warrant either substantive credits or specialist follow-up before closing.
For Sellers
If your home has a raised foundation, a pre-listing inspection that includes a careful crawlspace pass can save you from surprises during the buyer’s inspection. Common pre-listing fixes that pay back: replacing a torn or missing vapor barrier, clearing a blocked vent, repairing an active drip from a copper supply line, and addressing any visible rodent or pest activity. California’s Transfer Disclosure Statement asks specifically about water intrusion, drainage problems, soil settlement, and pest infestation—a documented inspection helps you complete the form accurately and demonstrate good-faith disclosure.
The Value of a Ventura County InterNACHI Inspection
A crawlspace inspection is dirty work, and it is one of the parts of a home inspection where rushing or skipping shows up clearly later. Our team takes the time to enter and traverse every crawlspace where it is safe to do so, document what is there with photographs, and report back in plain language. We see Ventura County homes from 1920s post-and-pier bungalows to brand-new continuous-foundation builds, and we know the failure patterns in each era—because we have spent enough hours under enough houses to recognize them.
Inspection Disclaimer
InterNACHI inspections are visual, non-invasive evaluations conducted in accordance with the Standards of Practice. Inspectors document observed conditions in accessible crawlspace areas but do not perform invasive testing, structural engineering analysis, mold sampling, asbestos testing, or wood-destroying-organism testing as defined by California’s structural pest control laws. Professional contractors, structural engineers, licensed pest control operators, and accredited testing labs may be needed for repairs and advanced diagnostics.
Buying or selling a raised-foundation home in Ventura County or Southern California? Schedule your InterNACHI home inspection today—the hour we spend in your crawlspace is one of the most valuable parts of the inspection you’ll receive.